Advanced Tweaks: Squeeze Every Frame Out of CS2
It’s hard to keep Counter-Strike 2 running smoothly because updates can slow it down. If your game stutters or has low frame rates, this guide will help. We’ll go step-by-step and test each change to show you what really matters. Forget about those “magic” commands and scripts you find online that don’t actually do anything! This guide shows you the real way to improve your game’s performance, whether you have a slow or fast computer. We tested every setting and tip ourselves, so you can see what makes the biggest difference. We’ve looked at almost every tip on the internet and put the best ones here.

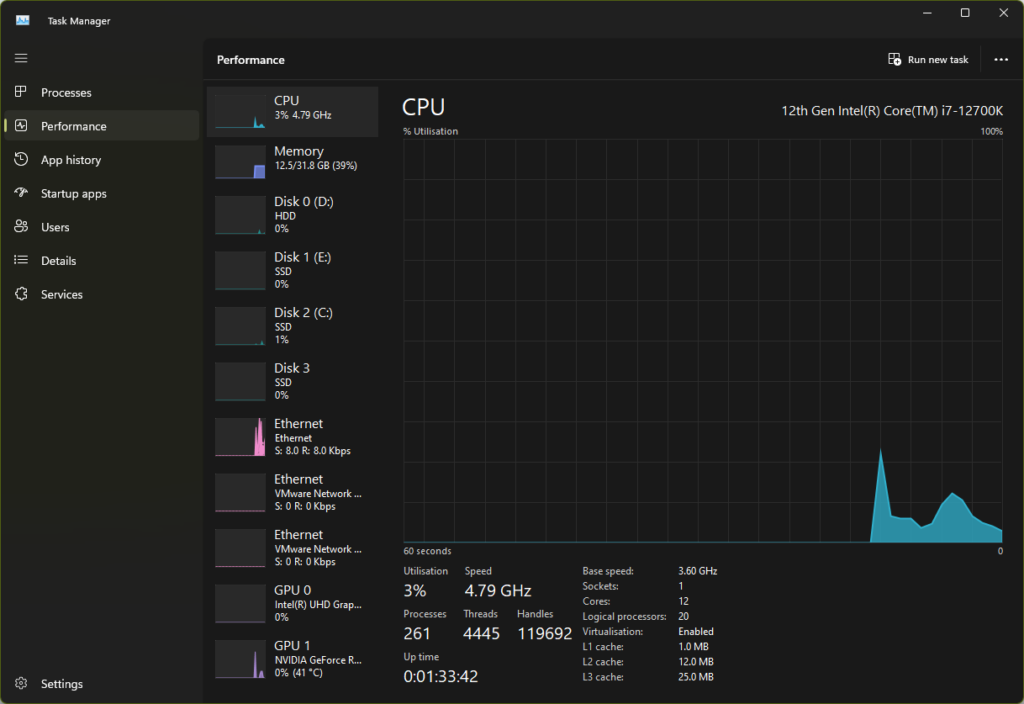
For the remainder of this optimization guide, the following machine and specifications were used for testing:
Microsoft Windows 11 PRO
Version 10.0.22621 Build 22621
Processor	12th Gen Intel(R) Core(TM) i7-12700K, 3600 Mhz, 12 Core(s), 20 Logical Processor(s)
Motherboard PRO Z690-A DDR4(MS-7D25)
Installed Physical Memory (RAM) 32.0 GB Corsair 3200 (A) (2x16GB)
Graphics Card MSI RTX 3080 Suprim 10GB
Crucial P3 500GB 6000/s
This guide helped improve the game’s frame rate, but not by a huge amount. However, the game now feels much smoother and the frame rate stays above 144 frames per second. Here are the best results we got for average frame rate and the lowest 1% of frame rates.
Average FPS
275 up to 400

%1 Low FPS
119 up to 150
I used an LG monitor with a screen resolution of 2560×1440 and a refresh rate of 144Hz for these tests. I played Counter-Strike 2 at a resolution of 1440×1080 stretched, without black bars on the sides, to maintain a 144Hz refresh rate. I also briefly tested the game at the monitor’s native resolution to see how much the frame rate dropped.
Mythbusting CS2 FPS: WHAT TO EXPECT
It’s easy to get lost in the sea of “optimization tips” floating around the internet. But beware. Some outdated advice and persistent myths can actually harm your CS2 performance. Outdated launch options, deprecated commands, and even certain graphics settings might seem like quick fixes, but they can often lead to lower FPS, instability, or even crashes. For example, do you remember this:
threads XYou might think that using all of your computer’s processing power would make Counter-Strike 2 run better, but that’s not always true. For example, setting your CPU threads to ‘X’ might actually reduce your FPS by up to 10%. This shows that some ‘optimization’ tricks can actually make things worse.
This guide will teach you the best ways to improve your Counter-Strike 2 performance. Only use the CPU threads option if you’ve tested it like we show you below and it actually improves your average and low frame rates.
STEP 0: OPTIONAL: CLEAN SYSTEM INSTALL IS THE EASIEST WAY
This step is optional, although very, very recomended. If you are really serious about getting to the bottom of it and optimise the game completely. A clean install of Windows will help. Over time, your computer accumulates a lot of unnecessary files and programs that can slow it down. This includes old apps, leftover files, and even broken registry entries. These things can negatively affect your performance in CS2.
A clean install of Windows removes all of the problems, giving you a fresh start. It also gets rid of old shader caches, large cache files, and community maps (this is only temporary - the game will re-download everything) that might be slowing down your PC.
After reinstalling Windows, you can skip most of the below steps and focus on adjusting launch options, changing settings in the NVIDIA Control Panel, and optimizing your in-game video settings. You can also create an autoexec file for advanced commands. This is way easier and will guarantee that you maximise your chances in higher FPS and less stutter.
The Thruth

A clean install of Windows is the best way to ensure you're getting the best possible performance in Counter-Strike 2. The steps below offer similar benefits to a clean install of Windows and Counter-Strike 2. They've been tested and benchmarked to provide the best possible results. However, while these steps can significantly improve performance, they might not be as completely effective as a full system reinstall.
If you choose to do a clean install of Windows, you’ll need to download a fresh copy of your operating system. You’ll also need to reinstall Counter-Strike 2. Once you’ve done that, you can come back here for more steps that will help you set up the best possible configuration for CS2. This includes creating an autoexec file, optimizing your NVIDIA Control Panel settings, and adjusting your in-game video settings.
This step wasn’t needed to improve the game’s performance in this guide. If you recently installed Windows and haven’t changed it much, you can skip this step. But for most people, this is the best way to make sure your system is running as smoothly as possible.
STEP 1: Benchmark Your CS2 to Establish a Starting Point
Before you start changing your game settings, it’s helpful to know how well Counter-Strike 2 is running right now. You can do this by benchmarking the game, which basically means testing your performance and getting an FPS (frames per second) score. This score shows you how smoothly the game runs on your current settings.
Benchmarking is important because it lets you see how different settings affect your performance. When you change a setting, you can benchmark again and see if your FPS goes up or down. This helps you find the best combination of settings for your computer.
To accurately measure your FPS, you'll need a consistent testing environment.  A popular choice in the CS2 community is 'CS2 FPS BENCHMARK by Angel & Ariana', available on the Steam Workshop. This map provides a controlled scenario for reliable benchmarking.

https://steamcommunity.com/workshop/filedetails/?id=3240880604
Run the game, go to PLAY – WORKSHOP – CS2 FPS BENCHMARK.
Do not touch your PC, let it play all the way and wait for the Console Window to open with the results. It looks like this:
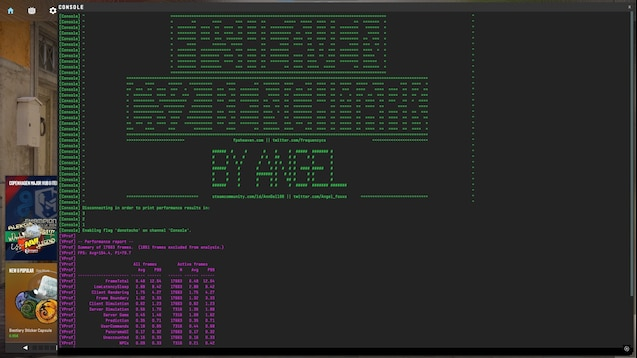
After it is done, highlight all the purple output text, then copy and paste into your favourite notepad, for comparison later on.
This is your baseline. It will show your average (AVG) and lowest (P1) frames per second. For the best results, run the program at least three times. To catch even minor variations, it's recommended that you quit the game or even restart your PC in between the tests.As you go through the steps below, it's a good idea to restart your computer and run the same benchmark after each one. This will help you see how each change affects your performance. You can even save the results of each benchmark in a separate text file with a short description so you can compare them easily.
Benchmark
| Date | Benchmark | Average FPS | Low P1 FPS | Resolution |
|---|---|---|---|---|
| 04.10.24 | 1 | 275 | 119 | 1440×1080 |
| 04.10.24 | 2 | 270 | 120 | 1440×1080 |
This is initial benchmark, a real-life representation of how the CS2 runs on our PC. The above table is a cut out from the full table containing over 100 of benchmarks. The full version is available at the end of the optimisationo guide.
STEP 2: REMOVE ALL OBSOLETE LAUNCH OPTIONS
Remember those launch options you used to fine-tune Counter-Strike: Global Offensive? With the arrival of Counter-Strike 2, they’re no longer relevant. Valve has completely overhauled the game’s engine and configuration, making previous launch options obsolete. So, if you’re accustomed to adding commands to your game shortcut, you can skip that step now – they won’t affect CS2. However, there are a few exceptions for executing autoexec.cfg or other custom configuration files, which are covered in a separate post.
Remove all the launch options.

We only recommend to use -exec autoexec.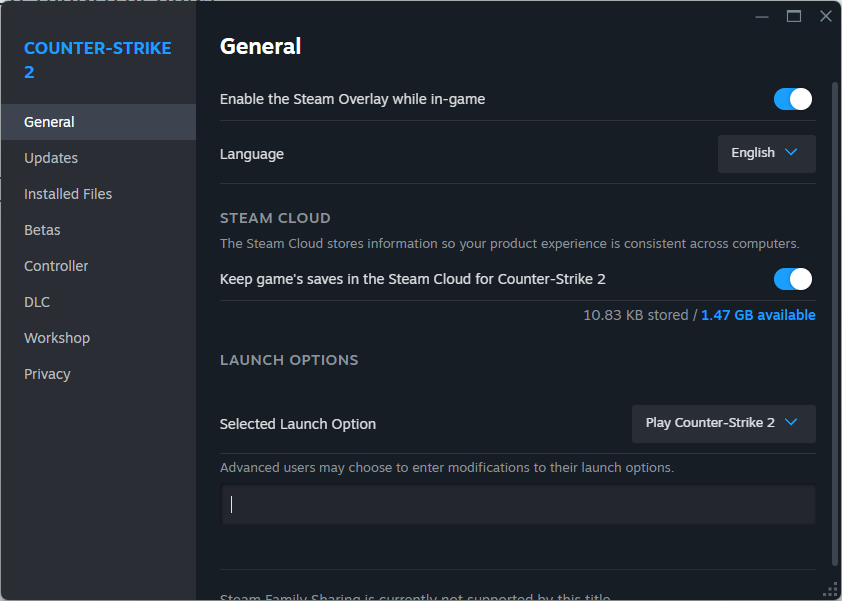
To find out more about why it is important, check out the updated guide to the best launch options for Counter Strike 2.
It is a good idea to restart your PC now and run a benchmark. Record your results.
Benchmark
| Date | Benchmark | Average FPS | Low P1 FPS | Resolution |
|---|---|---|---|---|
| 04.10.24 | 3 | 310 | 132 | 1440×1080 |
| 04.10.24 | 4 | 322 | 135 | 1440×1080 |
| 04.10.24 | 5 | 320 | 134 | 1440×1080 |
| 04.10.24 | 6 | 322 | 129 | 1440×1080 |
| 04.10.24 | 7 | 315 | 130 | 1440×1080 |
| 04.10.24 | 8 | 323 | 130 | 1440×1080 |
| 04.10.24 | 9 | 314 | 133 | 1440×1080 |
| 04.10.24 | 10 | 302 | 133 | 1440×1080 |
| 04.10.24 | 11 | 311 | 132 | 1440×1080 |
| 07.10.24 | 12 | 313 | 132 | 1440×1080 |
Adding 'threads 8' or 'threads 13' to the launch options (for an Intel i7 12700k processor) actually made the average frame rate and 1% low frame rate worse by more than 10%.Before updating the graphics driver, I tried a few things I found online:
- I removed the ‘Threads’ option from the game’s launch options.
- I turned off NVIDIA Reflex in the game settings.
- I turned NVIDIA Reflex back on and set it to ‘Enable + Boost’.
- I turned off G-Sync in the NVIDIA Control Panel.
- I turned G-Sync back on in the NVIDIA Control Panel and set Low Latency to ‘Ultra’ and Power Management to ‘Prefer Maximum Performance’.
- I turned Low Latency to ‘Off’ and Power Management to ‘Normal’.
- I changed in-game Multisampling to ‘CMAA2’ and Shadow Quality to ‘Medium’.
- I turned Low Latency back to ‘On’.
- I changed Multisampling back to ‘2 x MSAA’ and Shadow Quality back to ‘High’.
- I turned off ‘Player Boost’ in the game and set NVIDIA Reflex to ‘Enable’.
- I set ‘Threads’ to ’13’.
- I turned ‘Player Boost’ back on.
I tested the game’s performance twice before updating the graphics driver. The only thing that seemed to help was removing the launch options.
STEP 3: PURGE NVIDIA SHADER CACHE TO REBUILD CS2’S SHADERS
One often overlooked aspect of this optimization is managing your NVIDIA shader files. These files, while essential for rendering in-game graphics efficiently, can sometimes become outdated or corrupted, leading to performance hiccups like stuttering and lower frame rates.
There are many methods floating around the internet that claim to clear these shader files, but they often don’t work completely or are overly complicated. Thankfully, a simple PowerShell script exists that does the job correctly and efficiently. Purging these old files allows your system to rebuild a fresh, optimized cache, ensuring smoother gameplay and potentially even boosting your FPS.
Press Windows key and type PowerShell.
Select Run as Administrator.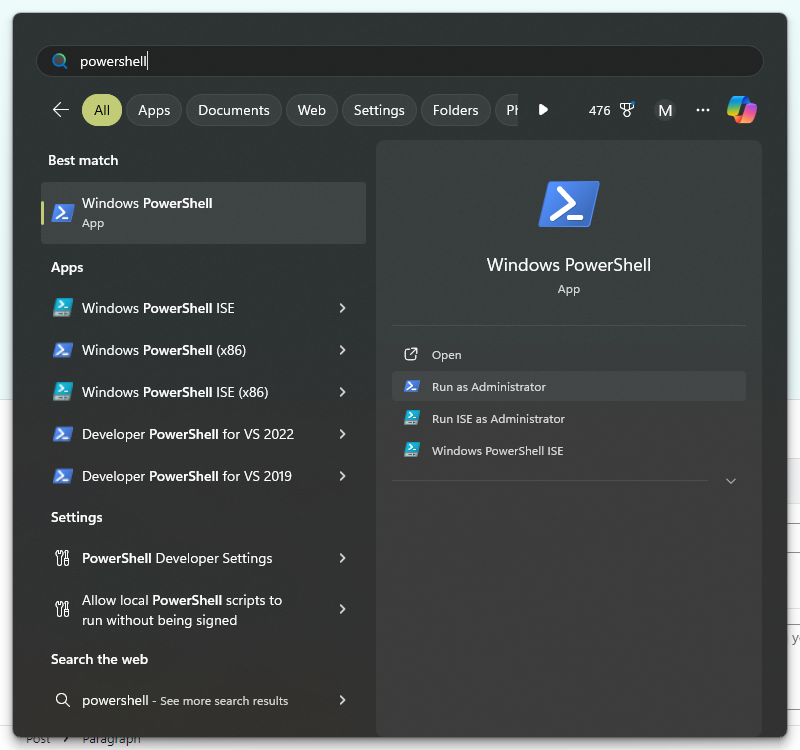
When PowerShell’s window opens, copy and paste the below script coded by https://gist.github.com/AveYo.
@(set ^ "0=%~f0" -d ' .bat or .ps1 script ) & powershell -nop -c . ([scriptblock]::Create((gc $env:0)-join \"`n\")) & exit /b ')

"`n  CLEAR SHADER CACHE `n"       # AveYo, 30.05.2024    Never use the preview text from pastebin! click copy, raw or download

$run = {
  # AveYo: detect STEAM and specific APPS
  $steam = resolve-path (gpv "HKCU:\SOFTWARE\Valve\Steam" SteamPath)
  $apps  = @{id = 730; name='cs2'; root='Counter-Strike Global Offensive'; game='csgo'},
           @{id = 570; name='dota2'; root='dota 2 beta'; game='dota'}
  gc "$steam\steamapps\libraryfolders.vdf" |foreach  {$_ -split '"',5} |where {$_ -like '*:\\*'} |foreach {
    $l = resolve-path $_; $apps |foreach { if (test-path "$l\steamapps\appmanifest_$($_.id).acf") { $_.lib = "$l\steamapps"
      $game = "$($_.lib)\common\$($_.root)\game"; $_.exe = "$game\bin\win64\$($_.name).exe"; $_.path = "$game\$($_.game)"
  }}}

  "`n close STEAM and APPS "
  $apps |foreach { if (ps -name $_.name -ea 0) {"$($_.name) was running..."; kill -name $_.name -force} }
  if (ps -name 'steam' -ea 0) {"Steam was running..."; start "$steam\Steam.exe" -args '-shutdown' -wait; sleep 5 }

  "`n empty STEAM logs "
  mkdir "$steam\logs\-EMPTY-" -force >''; robocopy "$steam\logs\-EMPTY-/" "$STEAM\logs/" /MIR /R:1 /W:0 /ZB >''

  "`n empty STEAM crash dumps "
  mkdir "$steam\dumps\-EMPTY-" -force >''; robocopy "$steam\dumps\-EMPTY-/" "$STEAM\dumps/" /MIR /R:1 /W:0 /ZB >''

  "`n empty APPS crash dumps "
  $apps |foreach { if ($_.exe) { del "$(split-path $_.exe)\*.mdmp" -force } }

  "`n empty APPS shadercache "
  $apps |foreach { $t = @("$($_.path)\shadercache", "$($_.lib)\shadercache\$($_.id)")
    if ($_.lib -ne "$steam\steamapps") { $t += "$steam\steamapps\shadercache\$($_.id)" } ; $t |foreach { if (test-path $_) {
      "$_"; mkdir "$_\-EMPTY-" -force >''; robocopy "$_\-EMPTY-/" "$_/" /MIR /R:1 /W:0 /ZB >''
  }}}

  "`n empty Compute cache "
  $t = "$([Environment]::GetFolderPath('ApplicationData'))\NVIDIA\ComputeCache"; if (test-path $t) {
    $t; mkdir "$t\-EMPTY-" -force >''; robocopy "$t\-EMPTY-/" "$t/" /MIR /R:1 /W:0 /ZB >''
  }

  "`n empty NV cache "
  $t = "$([Environment]::GetFolderPath('CommonApplicationData'))\NVIDIA Corporation\NV_Cache"; if (test-path $t) {
    $t; mkdir "$t\-EMPTY-" -force >''; robocopy "$t\-EMPTY-/" "$t/" /MIR /R:1 /W:0 /ZB >''
  }

  "`n empty Local shader cache "
  'D3DSCache','NVIDIA\GLCache','NVIDIA\DXCache','NVIDIA\OptixCache','NVIDIA Corporation\NV_Cache',
  'AMD\DX9Cache','AMD\DxCache','AMD\DxcCache','AMD\GLCache','AMD\OglCache','AMD\VkCache','Intel\ShaderCache' |foreach {
    $t = "$([Environment]::GetFolderPath('LocalApplicationData'))\$_"; if (test-path $t) {
      $t; mkdir "$t\-EMPTY-" -force >''; robocopy "$t\-EMPTY-/" "$t/" /MIR /R:1 /W:0 /ZB >''
  }}

  "`n empty LocalLow shader cache "
  'NVIDIA\PerDriverVersion\DXCache','NVIDIA\PerDriverVersion\GLCache','Intel\ShaderCache' |foreach {
    $t = "$(split-path ([Environment]::GetFolderPath('LocalApplicationData')))\LocalLow\$_"; if (test-path $t) {
      $t; mkdir "$t\-EMPTY-" -force >''; robocopy "$t\-EMPTY-/" "$t/" /MIR /R:1 /W:0 /ZB >''
  }}

  "`n empty driver temp "
  "$env:systemdrive\AMD","$env:systemdrive\NVIDIA","$env:systemdrive\Intel" |foreach { if (test-path $_) {
    mkdir "$_\-EMPTY-" -force >''; robocopy "$_\-EMPTY-/" "$_/" /MIR /R:1 /W:0 /ZB >''
  }}

  "`n start steam "
  $quick = '-quicklogin -vgui -oldtraymenu -vrdisable -nofriendsui -skipstreamingdrivers'
  $start = '-cef-single-process -cef-disable-gpu -cef-force-occlusion -no-dwrite -forceservice -silent'
  $t_act = New-ScheduledTaskAction -Execute "$STEAM\steam.exe"; $t_act.Arguments += "$quick $start"
  $t_tri = New-ScheduledTaskTrigger -Once -At (Get-Date); $t_set = New-ScheduledTaskSettingsSet -AllowStartIfOnBatteries
  Register-ScheduledTask -Action $t_act -Trigger $t_tri -Settings $t_set -TaskName "t_steam" | Out-Null
  Start-ScheduledTask -TaskName "t_steam"; timeout /t 3 >''; Unregister-ScheduledTask -TaskName "t_steam" -Confirm:$false
  timeout /t 20
}

sp HKCU:\Console\cmd ScreenColors 0x0b -type Dword -ea 0; sp HKCU:\Console\cmd QuickEdit 0 -type Dword -ea 0

# AveYo: $run elevated
if ([Security.Principal.WindowsIdentity]::GetCurrent().Groups.Value -notcontains 'S-1-5-32-544') {
  write-host " Requesting ADMIN rights.. " -fore Black -back Yellow; sleep 2; $_="$env:temp\runas.Admin"; sc $_ $run -force -ea 0
  start cmd -args "/x /d /r start `"cmd`" powershell -nop -c . ([scriptblock]::Create((gc \`"$_\`")-join \`"``n\`"))" -verb runas
} else { . $run }

$_press_enter_if_copy_pasted_to_powershell
Remember, you can always come back here as it is recommended to run this script every time the game updates or your NVIDIA drivers are updated to maintain optimal performance.
STEP 4: VERIFY COUNTER STRIKE 2 FILES
When you purge the shader cache, some Counter-Strike 2 installation files might go missing. To fix this and ensure everything is working correctly, you should verify the game files. This process checks your game installation and redownloads any missing or corrupted files. Verifying your CS2 installation is a simple process through Steam.
Right click Counter Strike 2 - Properties - Installed Files - Verify Integrity Of Game Files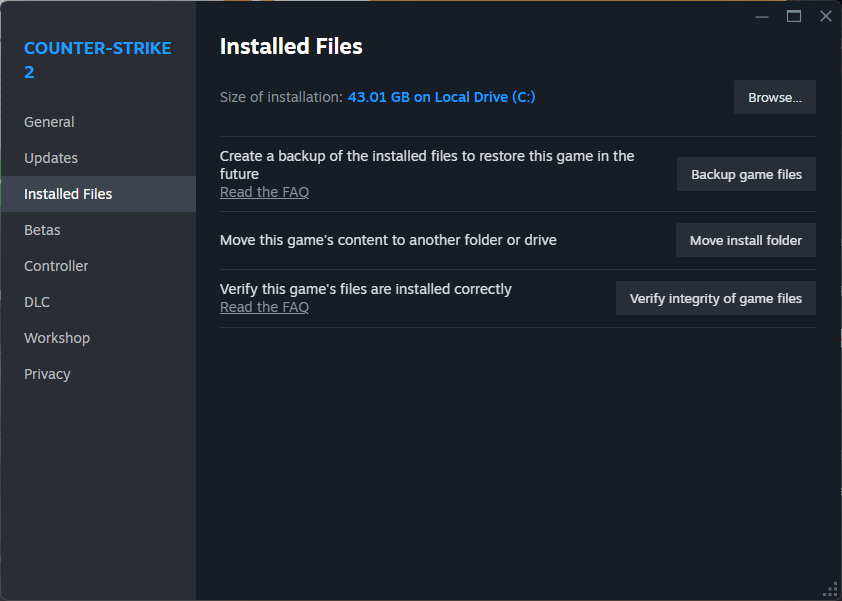
STEP 5: CORRECT WAY TO CLEAN INSTALL THE NVIDIA DRIVERS USING DDU
Display Driver Uninstaller, or DDU, is a tool that completely removes graphics card drivers from your computer. When you install new drivers through normal methods, sometimes old files get left behind. These leftover files can cause problems with the new drivers, like making your games stutter or crash.
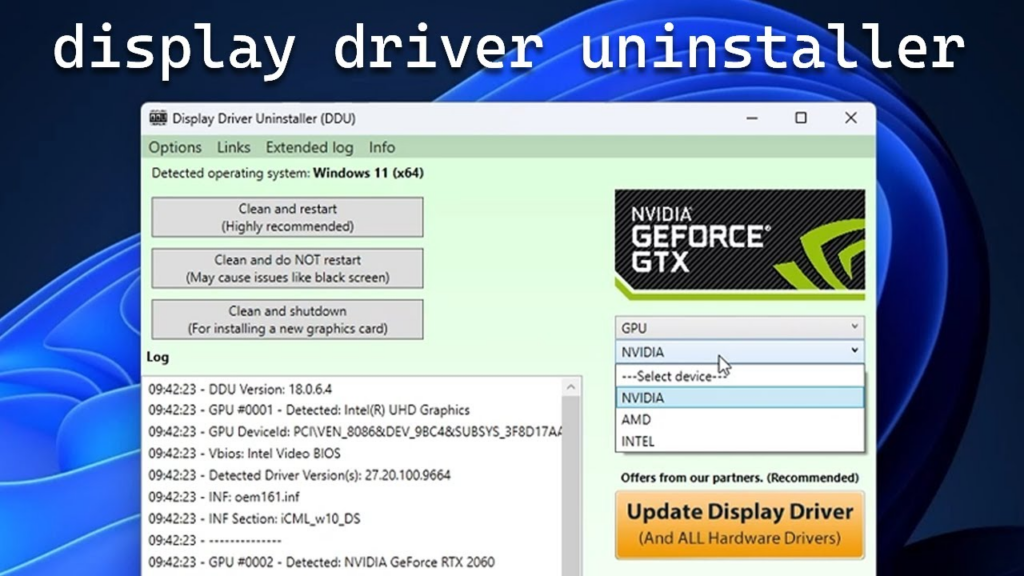
DDU makes sure everything from the old driver is gone before you install a new one. This clean install helps prevent problems and can even make your games run better.
You don’t need to use DDU every time you update your drivers. It’s most useful when you’re having problems with your graphics or when you’re switching from one brand of graphics card to another (like from AMD to NVIDIA).
If you’re looking to maximize your performance and boost your FPS in Counter-Strike 2, especially if you’ve been experiencing low frame rates since the Armory Update, it’s important to take this step.
Download Display Driver Uninstaller

https://www.guru3d.com/download/display-driver-uninstaller-download/
IMPORTANT: To use this tool correctly, you need to boot into Windows Safe Mode with internet disabled. This means, you should have your drivers downloaded before you begin the process.
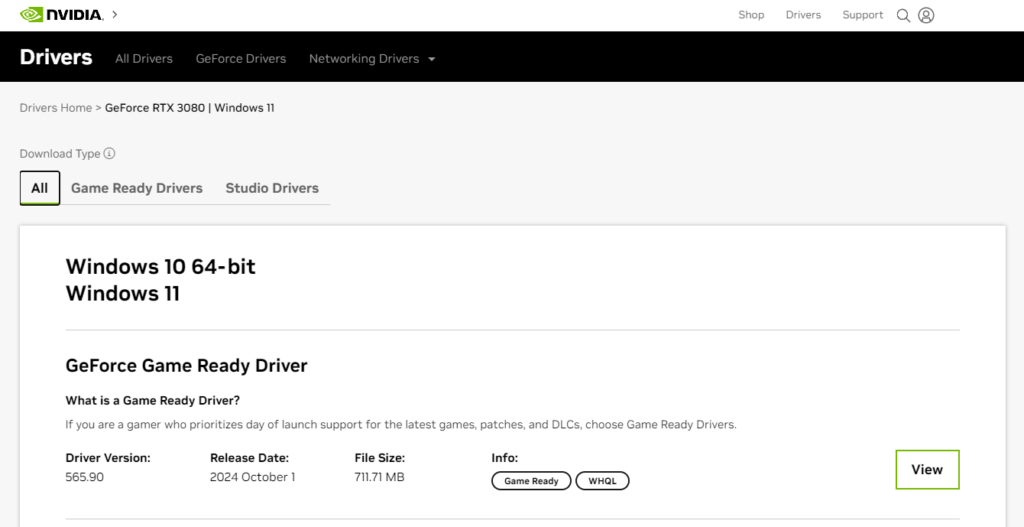
Download NVIDIA drivers

Download just the driver, without GeForce Experience. You can install it later on if you need it.
Alternatively download AMD Drivers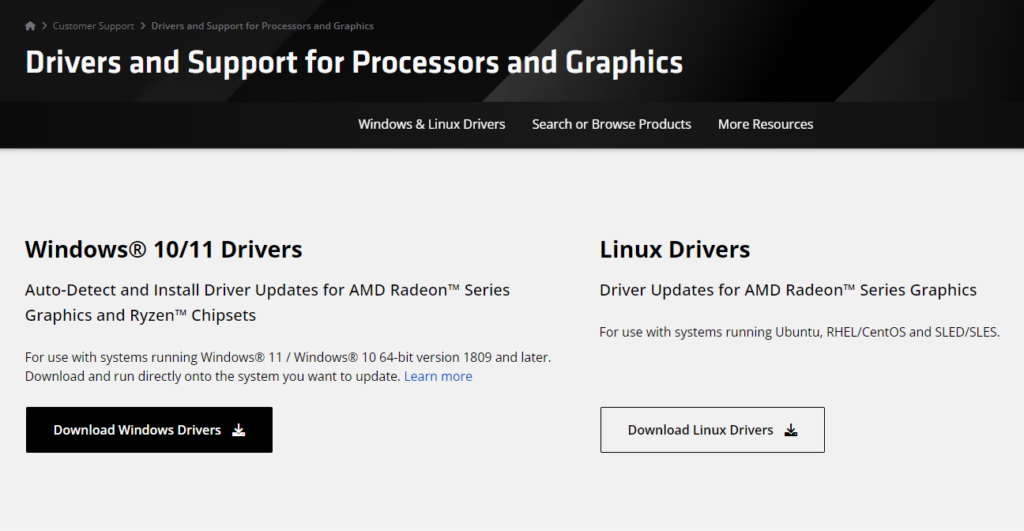
The next step is to restart your computer in Safe Mode without networking. This mode starts Windows with only the essential programs and drivers running, which helps prevent any interference during the driver installation. If you can’t use Safe Mode, you can also simply disconnect your computer from the internet by unplugging your ethernet cable or turning off your WiFi.
Press Windows key and type Advanced Start-Up Options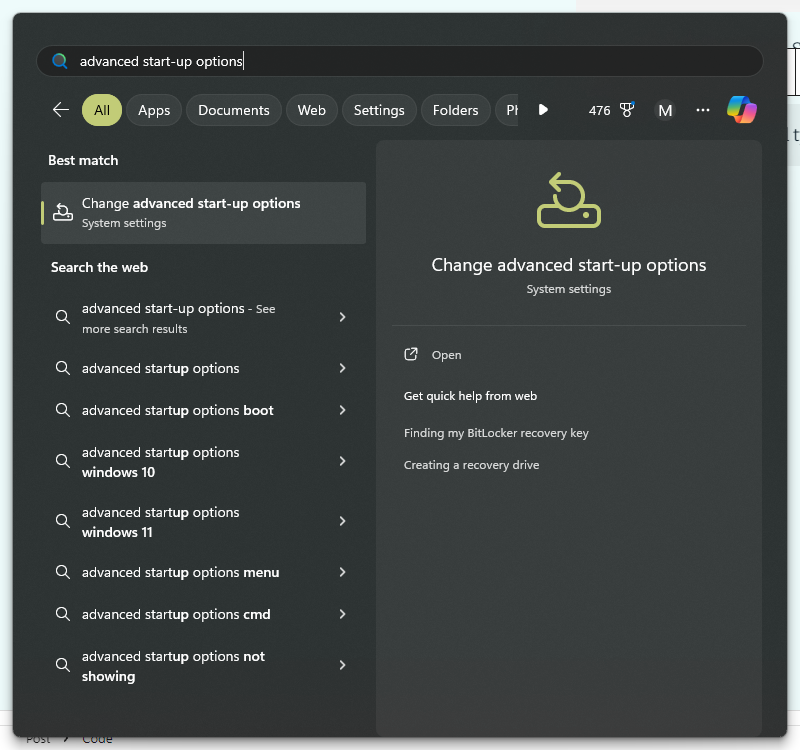
A Settings Window will open, where you can force restart your Windows 11 PC to gain access to Safe Mode.
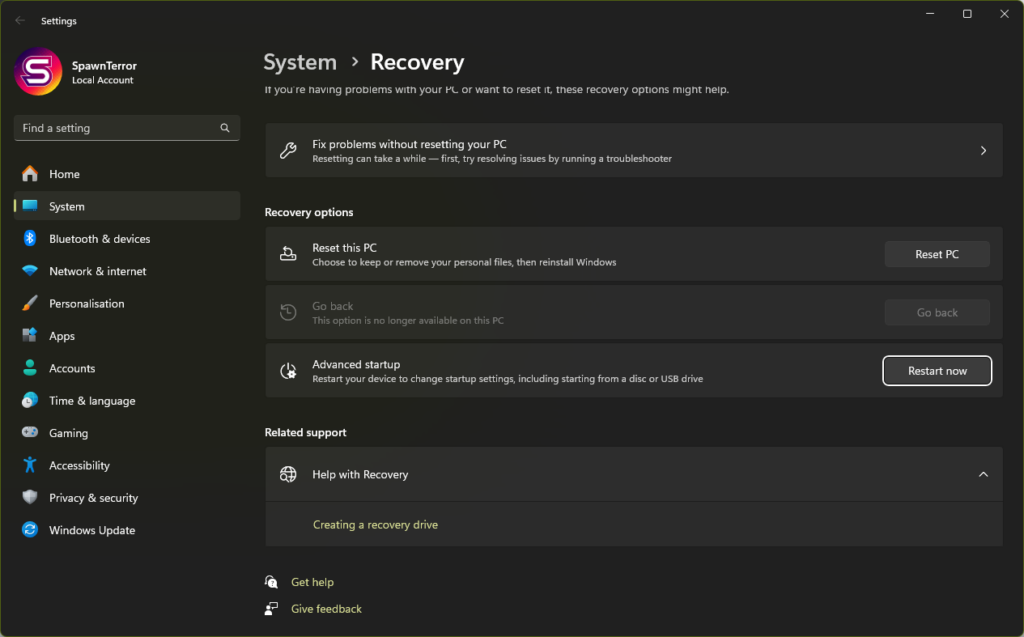
Click Restart Now. You will boot into blue Windows screen, where you can select Troubleshoot - Advanced Options - Start-up Settings and click Restart.

Now select option 4 for Safe Mode.
Hopefully you are in a Safe Mode now. If you are unsure, DDU will tell you that by a pop-up window asking your to boot into a Safe Mode.
Run DDU (Display Driver Uninstaller), select GPU only and click Clean & Restart.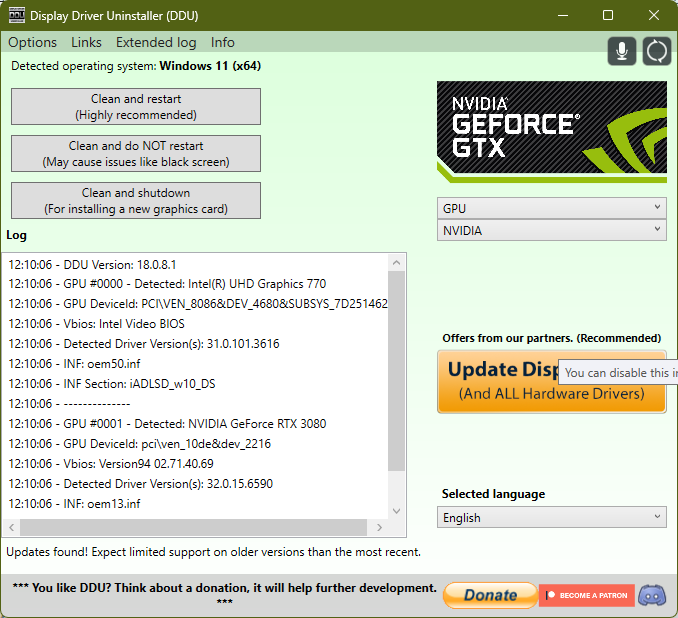
DDU will completely remove your old graphics drivers and then restart your computer. Remember that you should still be disconnected from the internet. This is important because you need to install the new drivers yourself before Windows tries to do it automatically.
Now it's time to install the new graphics drivers you downloaded earlier. You can choose to install just the driver itself, or you can install the entire GeForce Experience software package. However, installing only the driver will give you slightly better performance in Counter Strike 2.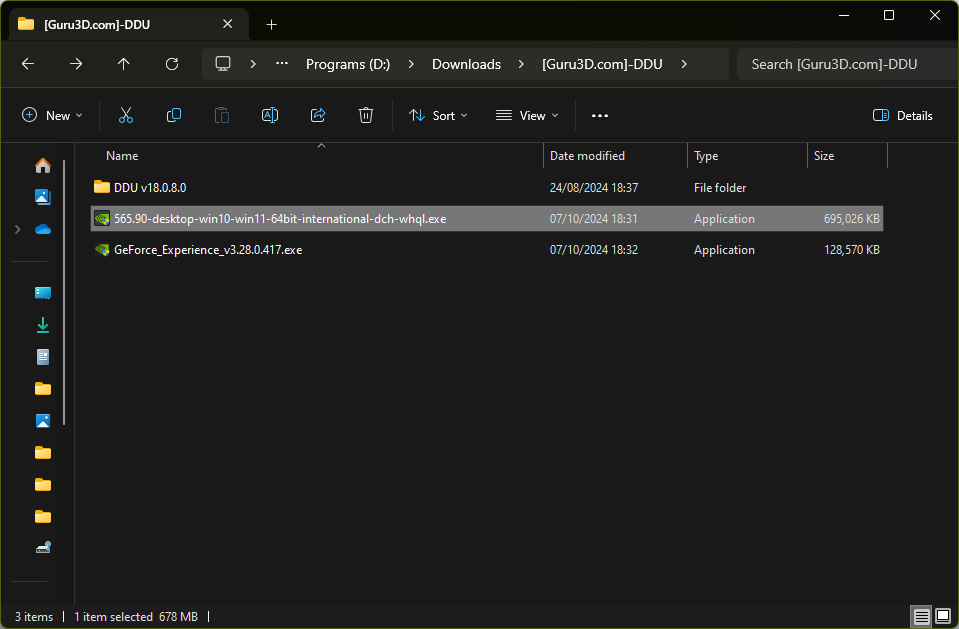
That’s all there is to it! You’ve now successfully, and correctly, installed the latest drivers for your graphics card. Even better, you’ve gotten rid of those old shader files that can lower your FPS, cause stuttering, and hurt your overall performance in CS2.
It is a good idea to restart your PC now and run a benchmark. Record your results.
Benchmark
| Date | Benchmark | Average FPS | Low P1 FPS | Resolution |
|---|---|---|---|---|
| 07.10.24 | 13 | 342 | 110 | 1440×1080 |
| 07.10.24 | 14 | 348 | 137 | 1440×1080 |
| 07.10.24 | 15 | 355 | 133 | 1440×1080 |
| 07.10.24 | 16 | 355 | 145 | 1440×1080 |
| 07.10.24 | 17 | 355 | 139 | 1440×1080 |
Steps 3 to 5 helped improve the average and 1% low frame rates the most, which is what I expected. The ‘shadercache’ script didn’t do anything on its own, but correctly removing the graphics driver with DDU improved the frame rates the most. This is because the game files and NVIDIA cache can become cluttered over time, which is why it’s important to clean them up regularly.
Unfortunately, Valve released an update around this time that made the game’s performance worse again and undid all the improvements I had made. Thanks, Valve!
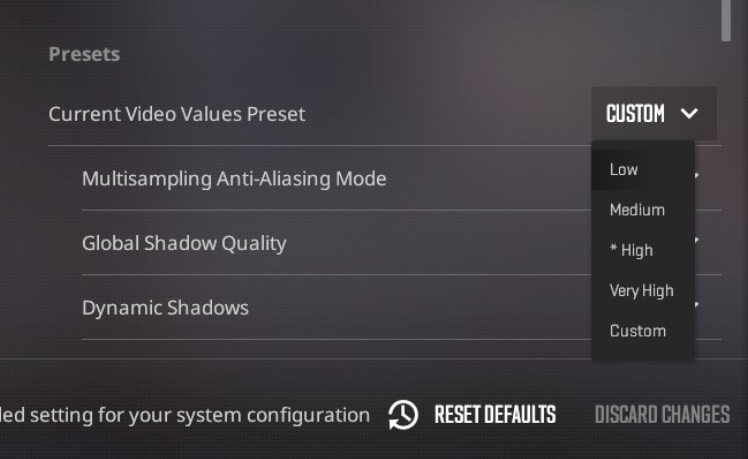
STEP 6: NVIDIA CONTROL PANEL SETTINGS
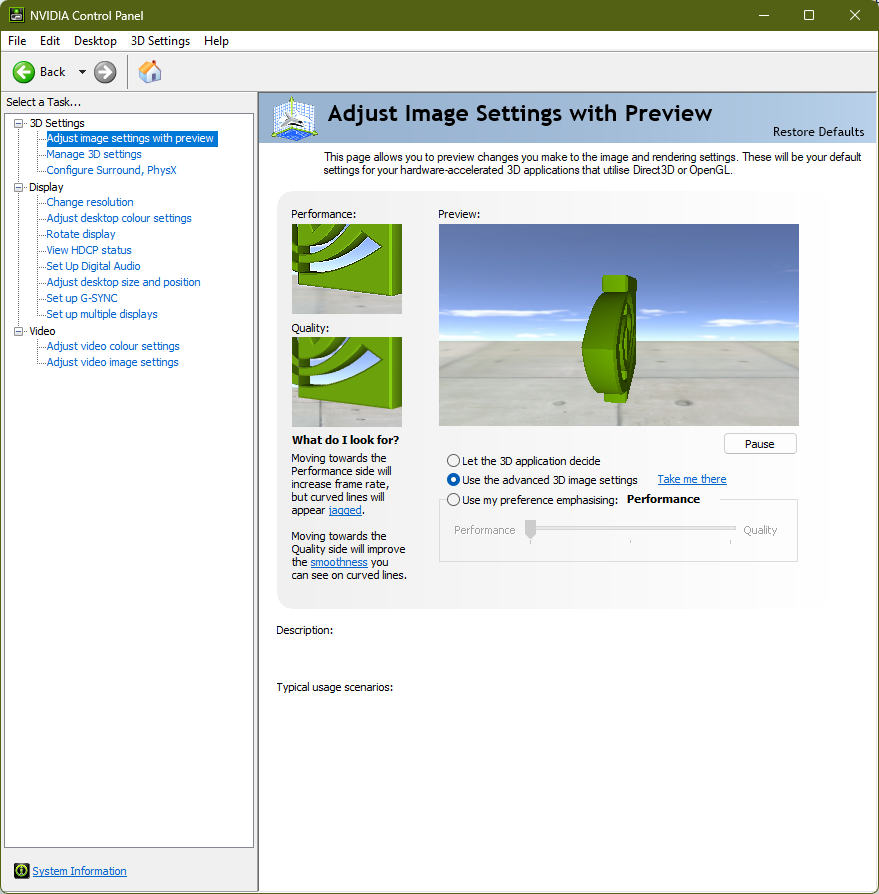
After you finish step 5, you’ll need to change a few settings in the NVIDIA Control Panel. To improve your performance in CS2, set everything as shown below:
Adjust Image Settings With Preview set to Performance.

After DDU / new driver update, this will get reset to Quality.

Remember to come back and set it to Performance.
Test number 13 shows what happens to the frame rate when the NVIDIA setting is changed back to ‘Quality’. It makes the average frame rate a little lower and the 1% low frame rate a lot lower.
Navigate to Manage 3D Settings.
Leave everything as default (makes things easier to remember over time)

Create a specific cs2.exe settings entry

Change Low Latency Mode to Ultra

Change Power Management Mode to Prefer Maximum Performance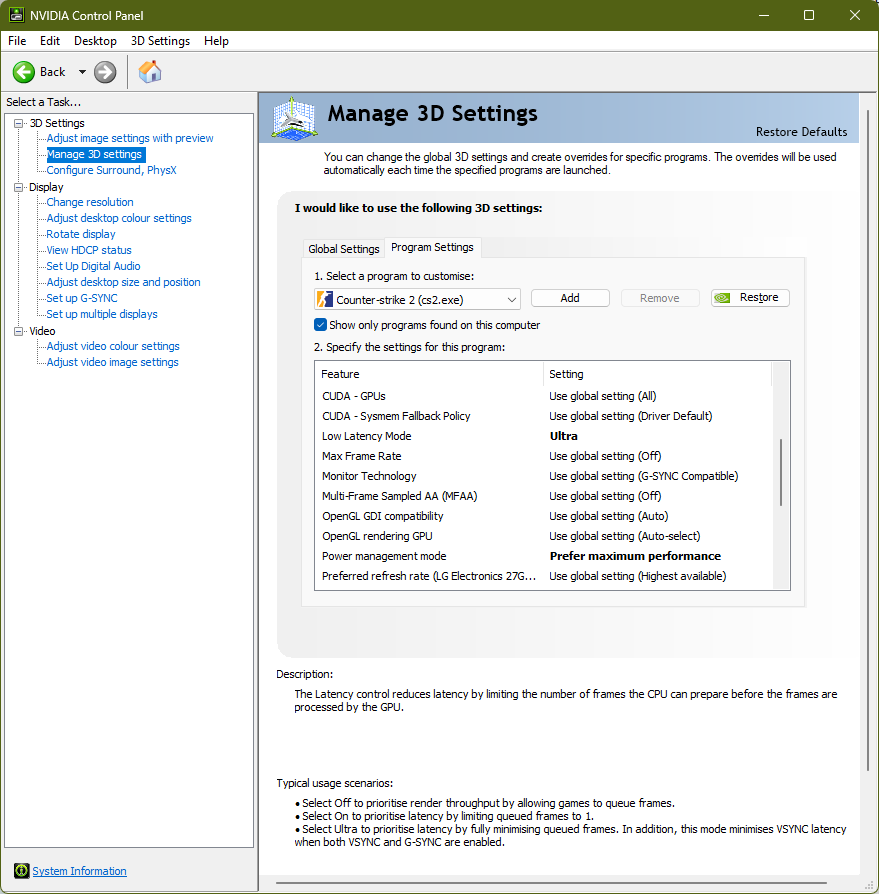
Out of all the settings in the NVIDIA Control Panel, only these two really made a difference in the frame rate. You can see the results in the table at the end of this guide.
STEP 7: TESTING POPULAR TIPS AND TRICKS FROM THE INTERNET
In this part of the guide, we’re going to do what many Counter-Strike 2 players do: try random launch options from the internet. We found some options on a website, but they didn’t work at all.
Unfortunately, the totalcsgo website offer these launch options:
+engine_low_latency_sleep_after_client_tick true +fps_max 0 -nojoy -high -fullscreen +mat_disable_fancy_blending 1 -forcenovsync +r_dynamic 0 +mat_queue_mode 2Some of these DO NOT EXIST ANYMORE, some will reduce your FPS!
Many players try to find the perfect combination of settings to improve performance, but it doesn’t exist. The best way to improve performance is to follow the steps we outlined earlier:
- Start with a clean system.
- Make sure your graphics driver is up-to-date.
- Remove any unnecessary launch options.
- Don’t use the ‘threads’ launch option.
- Clean up your autoexec config file.
- Adjust the advanced video settings for the best performance and visibility.
There are no secret tricks to improve performance in Counter-Strike 2. The game runs well on many different computers. You don’t need to try a bunch of different things to make it run well.
| Date | Benchmark | Average FPS | P1 Low Fps | Resolution | Comment |
|---|---|---|---|---|---|
| 10.10.24 | 18 | 331 | 136 | 1440×1080 | Repeated benchmark 1 of 2 as above to establish new baseline after CS2 update that affected performance. |
| 10.10.24 | 19 | 338 | 137 | 1440×1080 | Repeated benchmark 2 of 2 as above to establish new baseline after CS2 update that affected performance. |
| 10.10.24 | 20 | 336 | 137 | 1440×1080 | Disable Steam Overlay. |
| 10.10.24 | 21 | 325 | 128 | 1440×1080 | Threads changed to 12. |
| 10.10.24 | 22 | 327 | 140 | 1440×1080 | Threads changed to 13. |
| 10.10.24 | 23 | 328 | 133 | 1440×1080 | Process Lasso used to set CPU priority to always High for cs2.exe for this benchmark. |
| 10.10.24 | 24 | 326 | 138 | 1440×1080 | Process Lasso used to set CPU priority to always High for cs2.exe for this benchmark. Additionally, CPU 0 disabled in Process Lasso. Threads launch option command removed. |
| 10.10.24 | 25 | 341 | 131 | 1440×1080 | Remove Process Lasso altogether. Disable Full Screen Optimizations on cs2.exe file. |
| 10.10.24 | 26 | 340 | 140 | 1440×1080 | Restart PC and repeat benchmark as above. |
| 10.10.24 | 27 | 334 | 135 | 1440×1080 | Test TOTALCSGO launch options: -+engine_low_latency_sleep_after_client_tick true +fps_max 0 -nojoy -high -fullscreen +mat_disable_fancy_blending 1 -forcenovsync +r_dynamic 0 +mat_queue_mode 2 |
| 10.10.24 | 28 | 336 | 134 | 1440×1080 | Remove TOTALCSGO launch options and re-run benchmark. |
| 10.10.24 | 29 | 309 | 130 | 1440×1080 | Multisampling changed to 4 x MSAA. |
| 10.10.24 | 30 | 325 | 141 | 1440×1080 | Multisampling changed to 8 x MSAA. |
| 10.10.24 | 31 | 324 | 137 | 1440×1080 | Repeat previous run with 8 x MSAA. |
| 10.10.24 | 32 | 329 | 137 | 1440×1080 | Multisampling set to None. |
| 10.10.24 | 33 | 357 | 137 | 1440×1080 | Multisampling changed back to 2 x MSAA. Shadow Quality in-game changed to Low. |
| 10.10.24 | 34 | 333 | 137 | 1440×1080 | Shadow Quality in-game changed back to High. Dynamic Shadows to Sun Only. |
| 10.10.24 | 35 | 325 | 136 | 1440×1080 | Dynamic Shadows changed back to All. Shader Details in-game changed from default Low to High. |
| 10.10.24 | 36 | 338 | 135 | 1440×1080 | Shader Details changed back to Low. |
| 10.10.24 | 37 | 294 | 131 | 2560×1440 | Test different resolution of 2560 x 1440 (native). |
| 10.10.24 | 38 | 333 | 135 | 1440×1080 | Resolution back at 1440 x 1080 stretched. Enable Steam Overlay. |
| 10.10.24 | 39 | 331 | 140 | 1440×1080 | Final benchmark 1 / 4 before going a different route. |
| 10.10.24 | 40 | 325 | 140 | 1440×1080 | Final benchmark 2 / 4 before going a different route. |
| 10.10.24 | 41 | 328 | 131 | 1440×1080 | Final benchmark 3 / 4 before going a different route. |
| 10.10.24 | 42 | 327 | 137 | 1440×1080 | Final benchmark 4 / 4 before going a different route. |
STEP 8: reliable starting point
We’ll run four final tests with the same settings to get a reliable baseline.
These results are after a clean install of the graphics driver and removing all launch options.| Date | Benchmark | Average FPS | P1 Low FPS | Resolution |
|---|---|---|---|---|
| 10.10.24 | 39 | 331 | 140 | 1440×1080 |
| 10.10.24 | 40 | 325 | 140 | 1440×1080 |
| 10.10.24 | 41 | 328 | 131 | 1440×1080 |
| 10.10.24 | 42 | 327 | 137 | 1440×1080 |
The next benchmarks will take place in a set of 3 to minimise the statistical errors.

The will also be conducted using the below settings:
| Windows Game Mode | Hardware Accelerated GPU Scheduling | in-Game V-Sync | NVIDIA G-Sync |
| On | On | Off | On |
| In-Game NVIDIA Relfex | Multisampling | Shadow Quality | Player Boost |
| Enabled+Boost | 2 x MSAA | High | On |
| Dynamic Shadows | Shader Details | Texture Filter | Model Detail |
| All | Low | Anisotropic16x | Low |
| Fidelity FX | Disable Screen Optimisations | Steam Overlay | GeForce Experience |
| Off (Highest Quality) | On | On | Enabled |
| NVIDIA Low Latency | NVIDIA Power Management | NVIDIA Image Settings | Launch Option -threads |
| On | Normal | Performance | Launch Option removed |
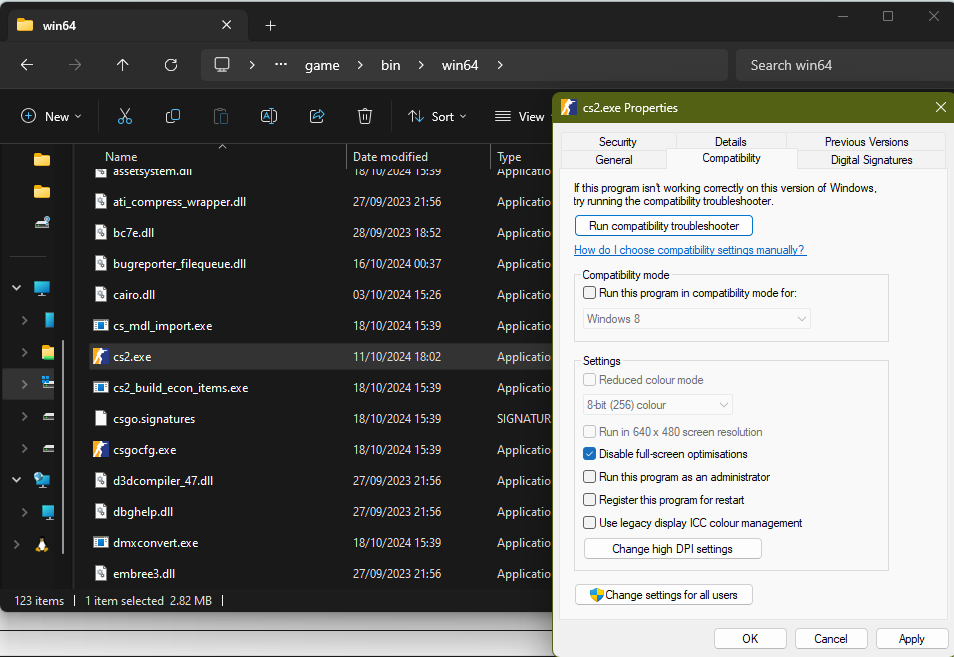
STEP 9: FULL SCREEN OPTIMISATIONS CS2.EXE MAKES NO DIFFERENCE
Some players say turning off ‘Fullscreen Optimizations’ for CS2.exe makes the game run better. This setting is in the Compatibility tab of the file’s Properties. It might improve your FPS or input lag, but it could also cause some display problems.
To Disable (tick the box) Full Screen Optimisations, navigate to:
Steam
Counter Strike 2 (right click)
Properties
Installed Files
Browse
This opens a Window’s folder. To find cs2.exe file, navigate to:
C:\Program Files (x86)\Steam\steamapps\common\Counter-Strike Global Offensive\game\bin\win64Right click the cs2.exe file and navigate to the Compatibility tab. Tick the box to disable this option.
Benchmark
We tested it by running the first three benchmarks with ‘Fullscreen Optimizations’ turned off. As you can see below, it didn’t make a difference at all. You can try it yourself, but you might need to turn it back on if you experience any other graphical problems.
| Date | Benchmark x 3 | Average FPS | P1 Low FPS | Resolution |
|---|---|---|---|---|
| 10.10.24 | 43 | 337 | 131 | 1440×1080 |
| 10.10.24 | 44 | 330 | 136 | 1440×1080 |
| 10.10.24 | 45 | 330 | 129 | 1440×1080 |
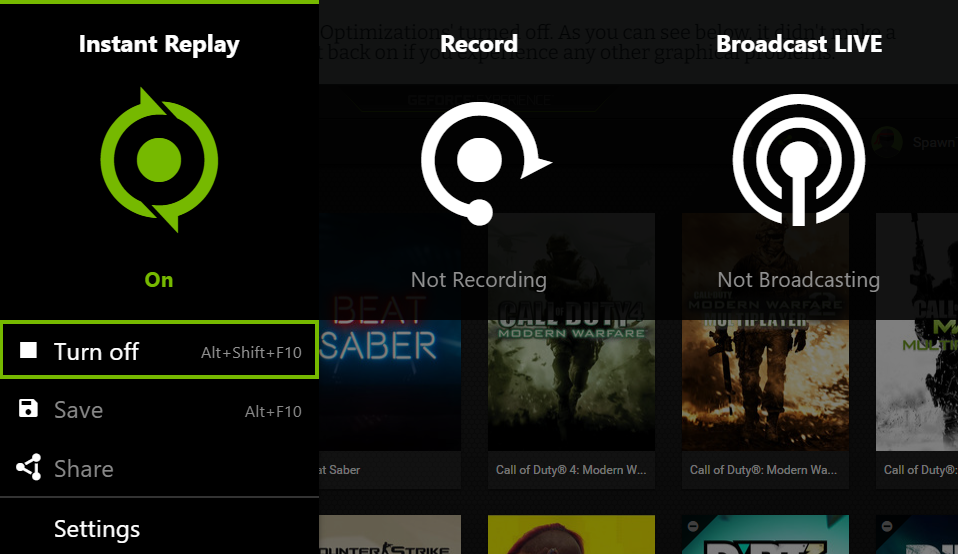
STEP 10: DISABLE NVIDIA EXPERIENCE FOR FEW MORE EXTRA FRAMES
Looking at the “Average FPS” column, there seems to be a general trend of slightly higher values when GeForce Experience is disabled. This suggests a small but potentially noticeable performance gain. The improvement seems more pronounced in the “1% Low FPS” column. This is important because 1% lows have a significant impact on perceived smoothness and responsiveness, especially during intense gameplay moments.
Benchmark
| Date | Benchmark | Average FPS | P1 Low FPS | Resolution |
|---|---|---|---|---|
| 10.10.24 | 46 | 328 | 102 | 1440×1080 |
| 10.10.24 | 47 | 335 | 135 | 1440×1080 |
| 10.10.24 | 48 | 339 | 135 | 1440×1080 |
STEP 11: IN-GAME VSYNC ON HAS NO IMPACT
Changing the in-game VSYNC option to off makes no impact on the FPS. The autoexec file linked in the launch options executes a command that sets the maximum FPS to 0 (unlimited).
As long as you set your commands correctly in your autoexec file, you will have FPS set to 0, which will guarantee the best performance. You can create your autoexec file at the link below:
Benchmark
| Date | Benchmark | Average FPS | P1 Low FPS | Resolution |
|---|---|---|---|---|
| 10.10.24 | 49 | 339 | 132 | 1440×1080 |
| 10.10.24 | 50 | 339 | 135 | 1440×1080 |
| 10.10.24 | 51 | 332 | 132 | 1440×1080 |
STEP 12: ENABLING CMAA2 – POOR VISIBILITY & NOT ENOUGH IMPROVEMENT
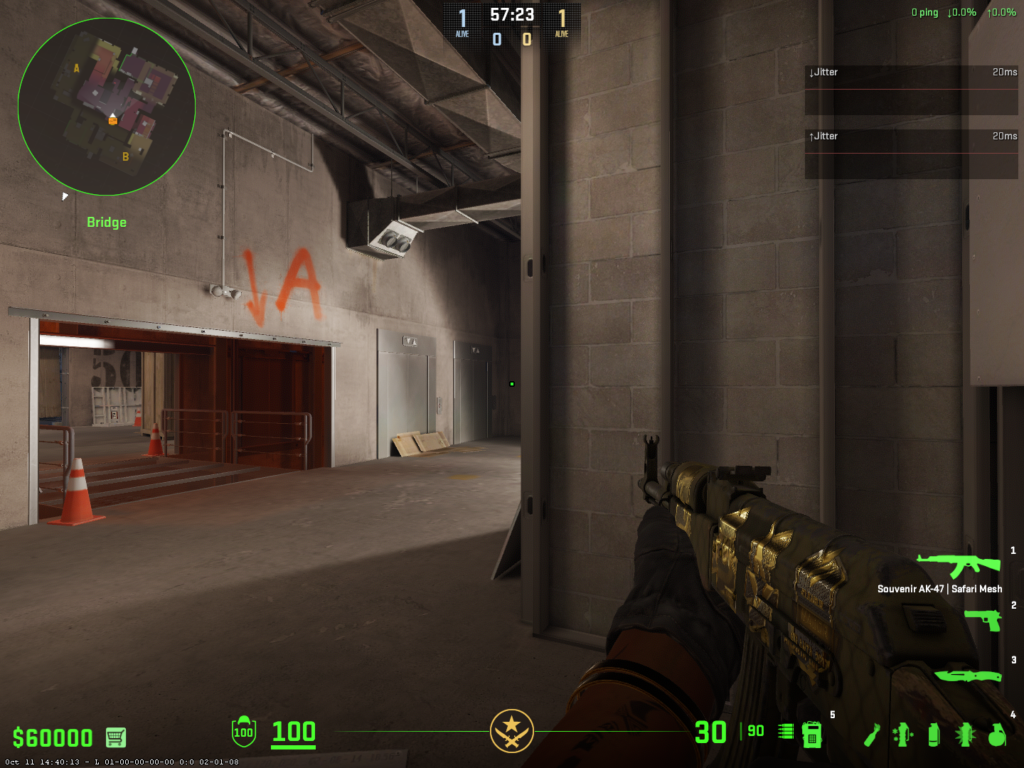
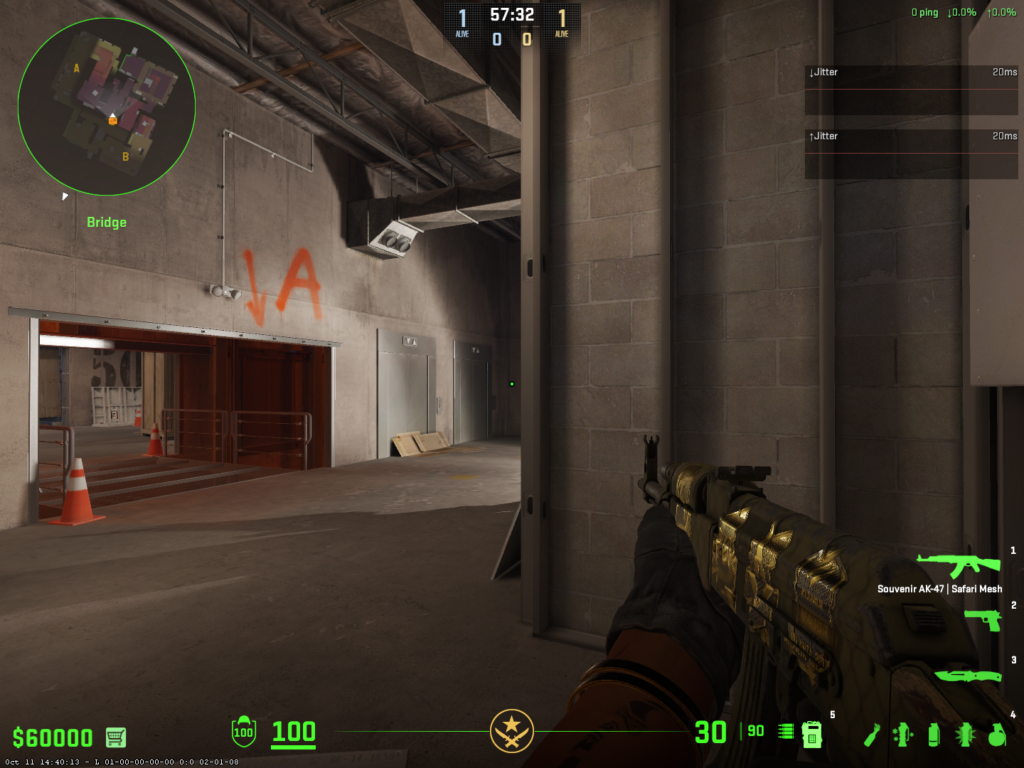
This one wil depends on your machine. On mid / hign end PCs it should not be considered. You always want to go with something higher to achieve the best visibility in-game. The difference is massive as shown on the photos.
CMAA2 OFFERS POOR VISIBILITY AND IS NOT WORTH IT
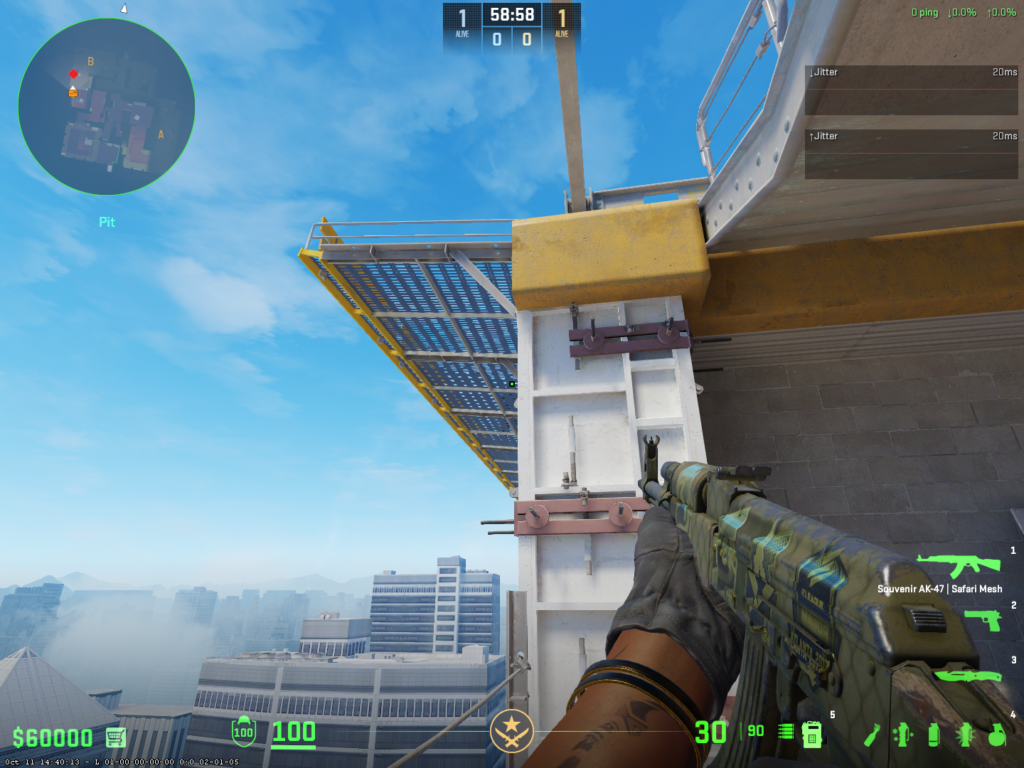
2 X MSAA IS AN ADVANTAGE, THE PRICE IS FEW OF YOUR FPS
Benchmark
The ‘CMAA2’ multisampling option makes it hard to see enemies, as you can see in the photos. It’s better to use ‘2 x MSAA’ because it makes enemies easier to spot behind certain materials on the maps, like on Vertigo in the photo. We can lower other settings to reach our goal of at least 145fps for the 1% low frame rate while still using ‘2 x MSAA’ multisampling.
| Date | Benchmark | Average FPS | P1 Low FPS | Resolution |
|---|---|---|---|---|
| 10.10.24 | 52 | 338 | 128 | 1440×1080 |
| 10.10.24 | 53 | 338 | 135 | 1440×1080 |
| 10.10.24 | 54 | 333 | 140 | 1440×1080 |
STEP 13: SHADOW QUALITY SET TO MEDIUM – HAS A POTENTIAL
Setting shadow quality to medium improves FPS a bit, but what happens if we set it to low? It still shows all the important shadows, so we can probably turn it all the way down without losing important information. This is the initial benchmark, later on we will confirm it still shows all the in-game shadows even if we set it to Low.
Benchmark
| Date | Benchmark | Average FPS | P1 Low FPS | Resolution |
|---|---|---|---|---|
| 10.10.24 | 55 | 343 | 135 | 1440×1080 |
| 10.10.24 | 56 | 342 | 133 | 1440×1080 |
| 10.10.24 | 57 | 344 | 142 | 1440×1080 |
STEP 14: TEXTURE FILTERING ANITROSOPIC 4X – NO DIFFERENCE
Frames are really the same if not lower, however we only run 3 benchmarks with the same settings, so it could include some errors.
Benchmark
| Date | Benchmark | Average FPS | P1 Low FPS | Resolution |
|---|---|---|---|---|
| 10.10.24 | 58 | 342 | 132 | 1440×1080 |
| 10.10.24 | 59 | 343 | 133 | 1440×1080 |
| 10.10.24 | 60 | 339 | 131 | 1440×1080 |
STEP 15: IN-GAME LOW SETTINGS
Setting the in-game preset o Low gives the biggest performance boost, but it’s not the best overall. The shadows don’t show up, and FidelityFX is set to performance mode (we’d rather have it on quality, but performance mode might be okay for slower computers). Also, dynamic shadows are set to ‘sun only’, which means enemy shadows don’t appear. That’s a big disadvantage, so we won’t use that setting. It is still being benchmarked to compare the FPS results.
Benchmark
| Date | Benchmark | Average FPS | P1 Low FPS | Resolution |
|---|---|---|---|---|
| 11.10.24 | 61 | 380 | 149 | 1440×1080 |
| 11.10.24 | 62 | 378 | 143 | 1440×1080 |
| 11.10.25 | 63 | 380 | 143 | 1440×1080 |
STEP 16: CURVE BALL – LAUNCH OPTIONS THAT DECREASE THE OVERAL FPS
After getting much better performance by setting the in-game preset to ‘Low’, we added some common launch options. These actually made performance worse, but we did this to show you that using random launch options can hurt your game.
-high -forcepreload 1 -threads 13 -mat_queue_mode 2Benchmark
In general, these launch options decreased the average FPS by 10 frames and P1 low FPS by just a few frames.
| Date | Benchmark | Average FPS | P1 Low FPS | Resolution |
|---|---|---|---|---|
| 11.10.29 | 67 | 370 | 144 | 1440×1080 |
| 11.10.30 | 68 | 362 | 141 | 1440×1080 |
| 11.10.31 | 69 | 365 | 144 | 1440×1080 |
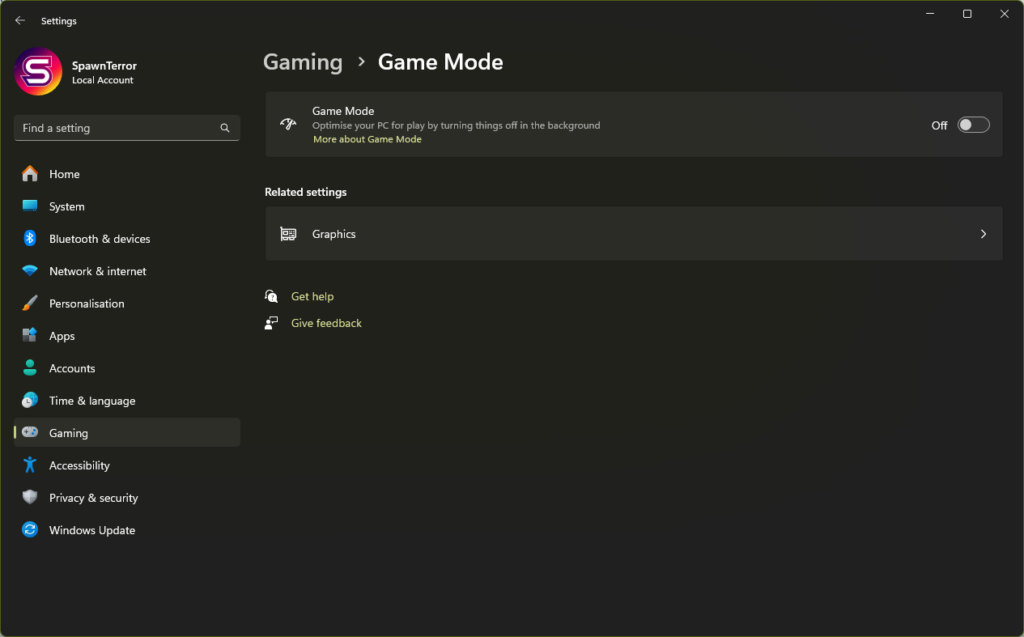
STEP 17: DISABLING WINDOWS GAME MODE – MINIMAL IMPROVEMENT
Turning off Windows Game Mode probably won’t improve performance much, if at all. The improvement is so small that it’s not worth the risk of messing up other games.
Benchmark
| Date | Benchmark | Average FPS | P1 Low FPS | Resolution |
|---|---|---|---|---|
| 11.10.32 | 70 | 391 | 147 | 1440×1080 |
| 11.10.33 | 71 | 374 | 147 | 1440×1080 |
| 11.10.34 | 72 | 385 | 138 | 1440×1080 |
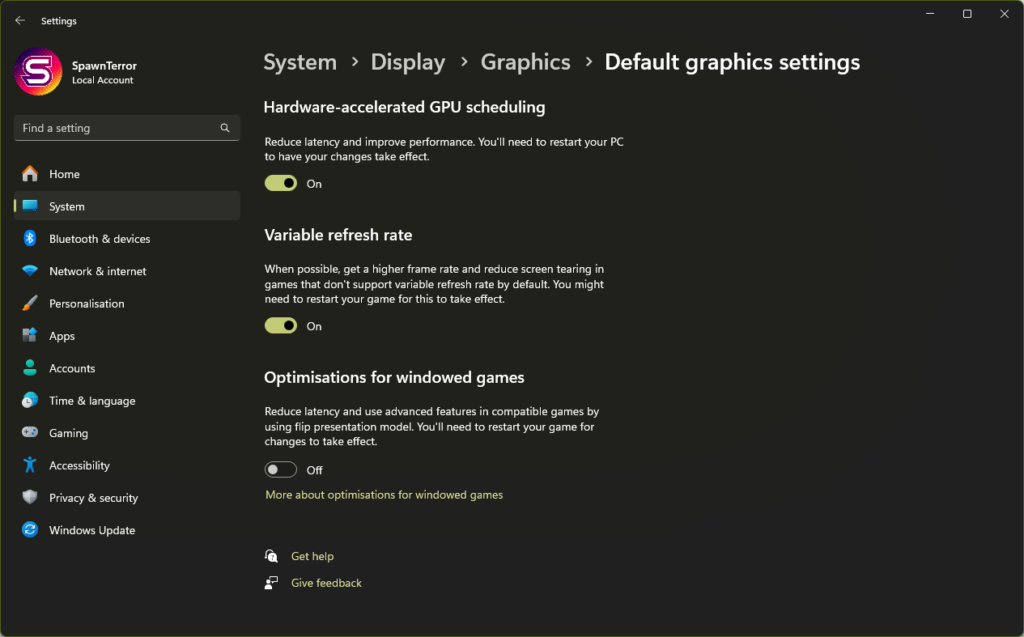
Step 18: The myth of hardware-accelerated GPU scheduling
Turning this OFF doesn’t make any real difference, and it might even lower your average frame rate and 1% lows. Counter-Strike 2 is already well-optimized for this, so you don’t need to worry about it.
If you have a low-end PC, you can try it, but make sure to test your performance before and after. Let us know if it helps, but only if you have the test results to prove it. I will leave this ON as the results show no advantage to have this option disabled.
Benchmark
| Date | Benchmark | Average FPS | P1 Low FPS | Resolution |
|---|---|---|---|---|
| 11.10.35 | 73 | 383 | 145 | 1440×1080 |
| 11.10.36 | 74 | 373 | 140 | 1440×1080 |
| 11.10.37 | 75 | 382 | 149 | 1440×1080 |
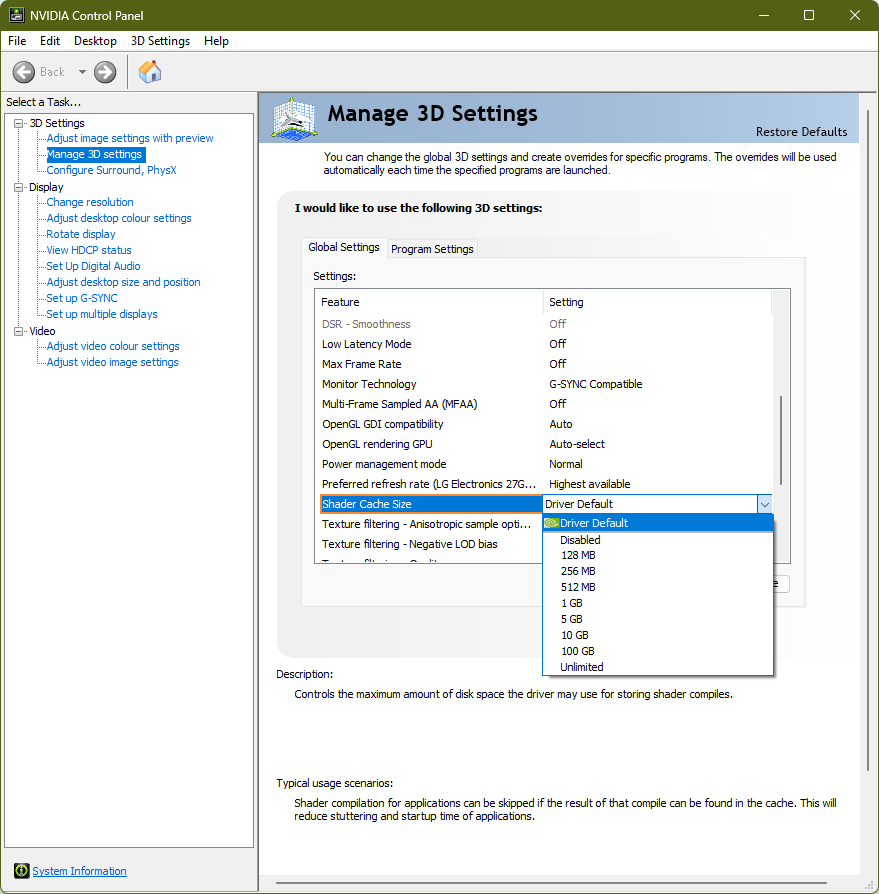
STEP 19: Another internet myth – setting the NVIDIA Control Panel shader cache to 10GB
We tried this random tip from the internet to see if it would improve performance in Counter-Strike 2. It didn’t change anything. This is just another myth that doesn’t affect the average frame rate or 1% lows.
Benchmark
| Date | Benchmark | Average FPS | P1 Low FPS | Resolution |
|---|---|---|---|---|
| 11.10.38 | 76 | 388 | 150 | 1440×1080 |
| 11.10.39 | 77 | 384 | 143 | 1440×1080 |
| 11.10.40 | 78 | 370 | 146 | 1440×1080 |
STEP 20: TESTING 1920 x 1080 and 2560 x 1440 Resolutions
Time for a break! Let’s increase the resolution and see how it changes our performance. It looks like we lose about 10 to 20 frames per second when we switch to full HD (1920×1080) and 2560×1440, respectively. The 1% low frame rates mostly drop below our target of 144Hz. This isn’t a huge change, but it’s expected because the graphics card has to work harder with higher resolutions.
Benchmark 1920 x 1080
| Date | Benchmark | Average FPS | P1 Low FPS | Resolution |
|---|---|---|---|---|
| 11.10.41 | 79 | 376 | 143 | 1920×1080 |
| 11.10.42 | 80 | 373 | 147 | 1920×1080 |
| 11.10.43 | 81 | 374 | 138 | 1920×1080 |
Benchmark 2560 x 1440
| Date | Benchmark | Average FPS | P1 Low FPS | Resolution |
|---|---|---|---|---|
| 11.10.44 | 82 | 366 | 138 | 2560×1440 |
| 11.10.45 | 83 | 363 | 140 | 2560×1440 |
| 11.10.46 | 84 | 361 | 142 | 2560×1440 |
STEP 21: ANOTHER CURVE BALL – USING THREADS COMMAND TO LOWER FPS
Let’s throw some extra launch options into the CS2 settings and benchmark it.
Benchmark
Well, this time it didn’t go well. The average FPS and P1 low FPS dropped by 7.89%.
-threads 13 // use if you want less FPS| Date | Benchmark | Average FPS | P1 Low FPS | Resolution |
|---|---|---|---|---|
| 15.10.24 | 88 | 355 | 137 | 1440×1080 |
| 15.10.24 | 89 | 351 | 137 | 1440×1080 |
| 15.10.24 | 90 | 348 | 138 | 1440×1080 |
STEP 22: UNEXPECTED CS2 UPDATE AND DIALING BACK SOME SETTINGS
Around the 17th, Counter-Strike 2 got an update that fixed some problems with the video settings. This seems to have improved the average frames per second a bit. Even when we set FidelityFX to ‘Default’ (the highest quality), it didn’t really affect performance and we got the highest average FPS we’ve seen so far.
Benchmark
| Date | Benchmark | Average FPS | P1 Low FPS | Resolution |
|---|---|---|---|---|
| 17.10.24 | 91 | 400 | 142 | 1440×1080 |
| 17.10.24 | 92 | 390 | 142 | 1440×1080 |
| 17.10.24 | 93 | 390 | 149 | 1440×1080 |
STEP 23: GAME MODE , HAGS AND SHADER CACHE BACK TO DEFAULT
Changing these settings in the NVIDIA Control Panel (like shader cache size or hardware-accelerated GPU scheduling) lowered the average frame rate by about 10 frames per second. It’s up to you to decide if those extra 5-10 FPS are worth changing from the default settings.
Since graphics drivers are updated frequently, it’s generally a good idea to stick with the default settings to avoid any compatibility problems in the future. These tests show that Counter-Strike 2 is already well-optimized, and changing system settings doesn’t really make a difference. It is ultimately up to You.
Benchmark
| Date | Benchmark | Average FPS | P1 Low FPS | Resolution |
|---|---|---|---|---|
| 17.10.24 | 94 | 381 | 142 | 1440×1080 |
| 17.10.24 | 95 | 382 | 143 | 1440×1080 |
| 17.10.24 | 96 | 385 | 140 | 1440×1080 |
STEP 24: ESTABLISHING THE BEST SETUP WHILE KEEPING MOST OF THE FPS GAINS – 2 x MSAA ON
Since switching to LOW preset in the Advance Video options, we need to re-enable Multisampling. As shown in Step 12, playing anything lower than 2 x MSAA is a massive disadvantage. Let’s benchmark 2 x MSAA and slowly see what we can keep to have a balance between visibility and performance.
2 x MSAA is a must have. As in Step 12, it help to see the enemies better.Benchmark
| Date | Benchmark | Average FPS | P1 Low FPS | Resolution |
|---|---|---|---|---|
| 17.10.24 | 97 | 367 | 140 | 1440×1080 |
| 17.10.24 | 98 | 352 | 135 | 1440×1080 |
| 17.10.24 | 99 | 365 | 145 | 1440×1080 |
STEP 25: FINAL STEP – THE BALANCE SETUP
Overall, these settings prioritize achieving high frame rates and smooth gameplay (especially important for competitive CS2) while maintaining decent visual quality. They are likely a good starting point for players looking to optimize their CS2 experience, particularly those who prioritize responsiveness and FPS.
It’s important to remember that the optimal settings can vary depending on your specific hardware and preferences. Experimenting and benchmarking with different settings is always recommended to find the best balance for your system.
Here’s a breakdown:
Display Settings:
- Resolution: 1440×1080 – This resolution offers a good balance between visual clarity and performance. It’s less demanding than higher resolutions like 1440p or 4K, resulting in higher frame rates, however, as seen on benchmarks above, it is OK to use higher resolution
- Display Mode: Fullscreen – Fullscreen mode generally offers the best performance as it dedicates the graphics card resources solely to the game. Fullscreen has not been tested and it was assumed it is used.
Graphics Settings:
- Global Shadow Quality: Low – Lowering shadow quality can significantly boost FPS. In this case, it’s set to low, still providing essential shadow information without overly impacting performance.
- Model / Texture Detail: Low – Reducing model and texture detail lessens the load on the graphics card, leading to higher frame rates.
- Texture Filtering: Bilinear – Bilinear filtering is less demanding than higher-quality filtering modes, contributing to better performance.
- Shader Detail: Low – Lowering shader detail reduces the complexity of visual effects, improving FPS.
- Boost Player Contrast: On – This setting helps players stand out from the background, improving visibility without a significant performance hit. Has no impact on med, high PC specs.
- Multisampling Anti-Aliasing Mode: 2 x MSAA – MSAA smooths out jagged edges, and 2x MSAA offers a decent balance between visual improvement and performance cost.
- FXAA Anti-Aliasing: Off – FXAA is another anti-aliasing technique, but it can make the image look blurry. It’s turned off here likely to maintain image sharpness.
- Texture Filtering Mode: Anisotropic – Anisotropic filtering improves texture clarity at angled views. It has a moderate performance impact.
- Ambient Occlusion: Off – Ambient Occlusion adds realistic shading and depth to the scene but can be demanding on performance. It’s disabled here for better FPS.
- High Dynamic Range: Off – HDR can enhance the visual range but requires more processing power. It’s off in this configuration.
- FidelityFX CAS: Off (Highest Quality) – FidelityFX CAS is an upscaling technology that can improve performance. It’s set to its highest quality mode, prioritizing visuals over maximum performance gains.
Advanced Settings:
- Motion Blur: Off – Motion blur can be visually distracting for some players and is disabled here.
- Dynamic Shadows: ALL – this is a must have. This setting set to Sun Only will only renders shadows cast by the sun, reducing the processing load compared to rendering all dynamic shadows, however, it won’t render an enemy player in specific locations with sources of lights.
Dynamic Shadows – Sun Only – Enemy Player’s shadow is not visible
Dynamic Shadows – All – Enemy Player’s shadow is visible earlier
NVIDIA Control Panel Settings:
- Low Latency Mode: Ultra – This setting minimizes input lag, making the game feel more responsive.
- Power Management Mode: Normal – This setting uses the default power management profile for the graphics card.
Other:
- Launch Options: Removed – No special launch options are used, sticking to the game’s default settings.
- GeForce Experience: Disabled – GeForce Experience is turned off, likely to prevent any overlays or background processes from interfering with performance.
Benchmarks x 6
| Date | Benchmark | Average FPS | P1 Low FPS | Resolution |
|---|---|---|---|---|
| 17.10.24 | 100 | 357 | 145 | 1440×1080 |
| 17.10.24 | 101 | 357 | 140 | 1440×1080 |
| 17.10.24 | 102 | 357 | 150 | 1440×1080 |
| 17.10.24 | 103 | 357 | 141 | 1440×1080 |
| 17.10.24 | 104 | 360 | 141 | 1440×1080 |
| 17.10.24 | 105 | 360 | 144 | 1440×1080 |
| 17.10.24 | 106 | 358 | 141 | 1440×1080 |
| 17.10.24 | 107 | 352 | 145 | 1440×1080 |
| 17.10.24 | 108 | 357 | 138 | 1440×1080 |
FINAL THOUGHT AND RESULTS OF THIS OPTIMISATION WRITE-UP
This CS2 optimization guide should still be helpful in 2025 unless there’s a major engine upgrade. Remember the basics: keep your PC cool and clean, avoid unnecessary programs and registry tweaks, and don’t rely on unproven launch options or internet “magic.” Always test your settings to see what actually works for your system. Some settings might not have a noticeable impact, so you can safely use them without sacrificing performance. By following these tips and testing your own settings, you can ensure a smooth and enjoyable CS2 experience./
Optimal performance was achieved by removing the graphics driver using DDU in safe mode, clearing the shader cache for Counter-Strike 2 with a PowerShell script, removing all unnecessary launch options, and keeping only the autoexec file. Shadow details were lowered to 'low', while dynamic shadows were kept set to 'all' and texture filtering was changed to Anisotropic 4x instead of 16x.
Before
| Date | Benchmark | Average FPS | P1 Low FPS |
|---|---|---|---|
| 04.10.24 | 1 | 275 | 119 |
| 04.10.24 | 2 | 270 | 120 |
After
| Date | Benchmark | Average FPS | P1 Low FPS |
|---|---|---|---|
| 17.10.24 | 103 | 357 | 141 |
| 17.10.24 | 104 | 360 | 141 |
| 17.10.24 | 105 | 360 | 144 |
| 17.10.24 | 106 | 358 | 141 |
| 17.10.24 | 107 | 352 | 145 |
| 17.10.24 | 108 | 357 | 138 |
UPDATE 07 November 2024 – Counter Strike Animation Bandwidth Usage
Update 11/6/24 (11/7/24 UTC, 1.40.4.6)
Valve has updated the game, and for the first time, they have managed not to break the frame rate. However, they have introduced a significant lag compensation system. As a result, enemies often teleport on screen for players with lower pings. Bullet registration is also highly inconsistent. Comments like the one below are common, with many arguing that the issue lies with players’ home network setups. This is a widespread misconception, as the real problem stems from Valve and their developers.

Full release notes here:
GAMEPLAY
Various adjustments to bullet hit feedback.
Fixed a case mid-spray where lag compensation would rewind target hitboxes further into the past than what was on screen.
Jumping in place on a sloped surface will no longer result in players sliding a short distance.
Fixed a bug where C4 could be defused from any height.

ANIMATION
Fixes for IK logic to improve third-person feet posing, especially on slopes.
Fixed a case where the feet and legs of players could pop out of position when exiting the bomb-plant animation.
Reduced animation-related network bandwidth usage.

MATCHMAKING
Added more detailed matchmaking stats for players who try to find a match at off-peak times of day.

MISC
Activating an Armory Pass no longer grants the first Armory Credit immediately. All 40 Armory Credits can be earned by playing and earning XP.

MAPS
Office
Fixed geometry in the problematic jumping corner.
Ancient
Reworked collision on the staircase to A-main for better player movement.
Removed a tree that was creating a distracting shadow at A site.
Adjusted collision to better match visible geometry so that players can hug the walls more closely.
Fixed a few lighting bugs.
Reduced shadows to increase perf in some areas.
Fixed some spots in house where you could get stuck.
Fixed collision gap at the bottom of B ramp.
Fixed some disappearing mesh.
Nuke
Fixed some lighting errors on lower graphics settings.
Anubis
Fixed a gap in geometry.
The comparison of data from October 17th (before the update) and November 7th (the day after the update) shows no significant difference, with only a minimal increase of a few frames per second.
UPDATE 08 November 2024 – Steam Video Recording Feature Vs Nvidia Shadowplay
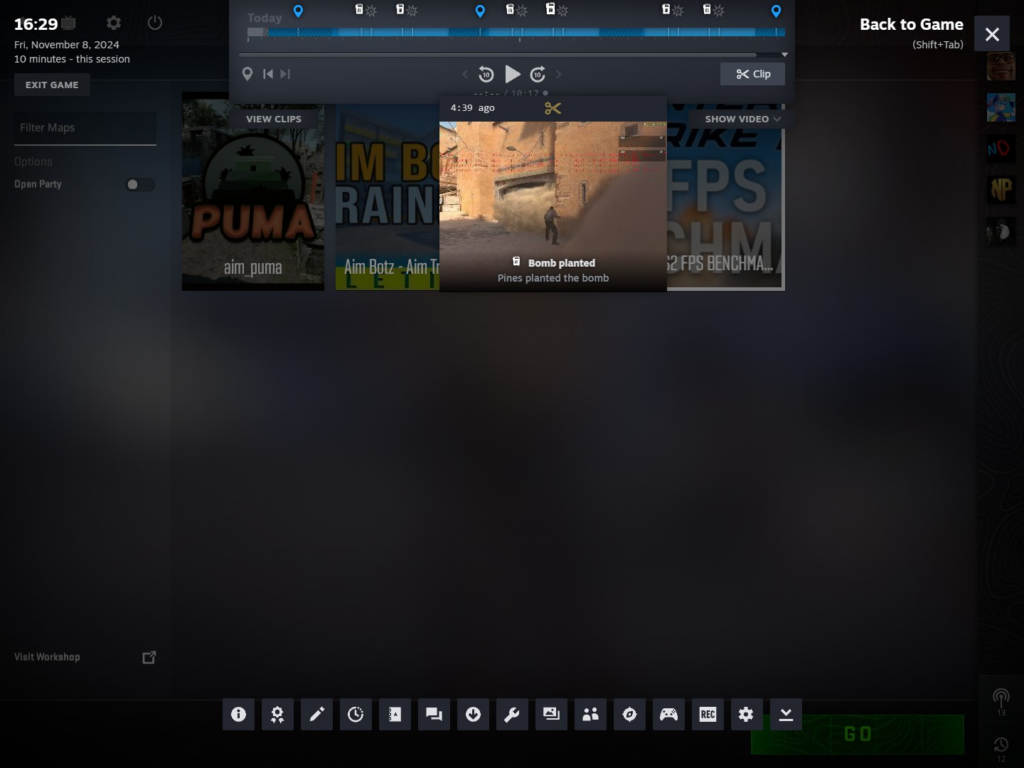
The Steam Game Recording feature update introduces a built-in tool within the Steam client for users to easily capture and record gameplay. The tool is currently in beta and aims to offer seamless integration without needing external recording software. This feature is designed to provide minimal impact on system performance, making it easier for users to share clips or footage directly through Steam’s platform. It supports various settings for customization, including resolution and frame rate options.
https://store.steampowered.com/gamerecording
Does Steam Recording affect performance? Yes, but despite its many useful features, the impact is relatively modest. If you typically achieve high frame rates, you should consider using the Steam Recording feature. It includes handy options like adding keyframe indicators, which let you easily mark and revisit specific moments. It can even automatically tag video clips in real-time with events like ‘bomb planted’ or ‘exploded.’ In terms of performance, the feature reduces average FPS by about 20, but it doesn’t significantly affect 1% lows. Refer to the comparison table below. Note: All benchmarks were conducted in sets of three.
| Date | Benchmark | Average FPS | P1 Low FPS | Comment |
|---|---|---|---|---|
| 17.10.24 | 106 | 358 | 141 | Shadowplay (not rec) |
| 17.10.24 | 107 | 352 | 145 | Shadowplay (not rec) |
| 17.10.24 | 108 | 357 | 138 | Shadowplay (not rec) |
| 07.11.24 | 109 | 365 | 144 | CS2 Update |
| 07.11.24 | 110 | 358 | 143 | CS2 Update |
| 07.11.24 | 111 | 360 | 143 | CS2 Update |
| 08.11.24 | 112 | 345 | 142 | Steam Game Recording |
| 08.11.24 | 113 | 341 | 144 | Steam Game Recording |
| 08.11.24 | 114 | 340 | 140 | Steam Game Recording |
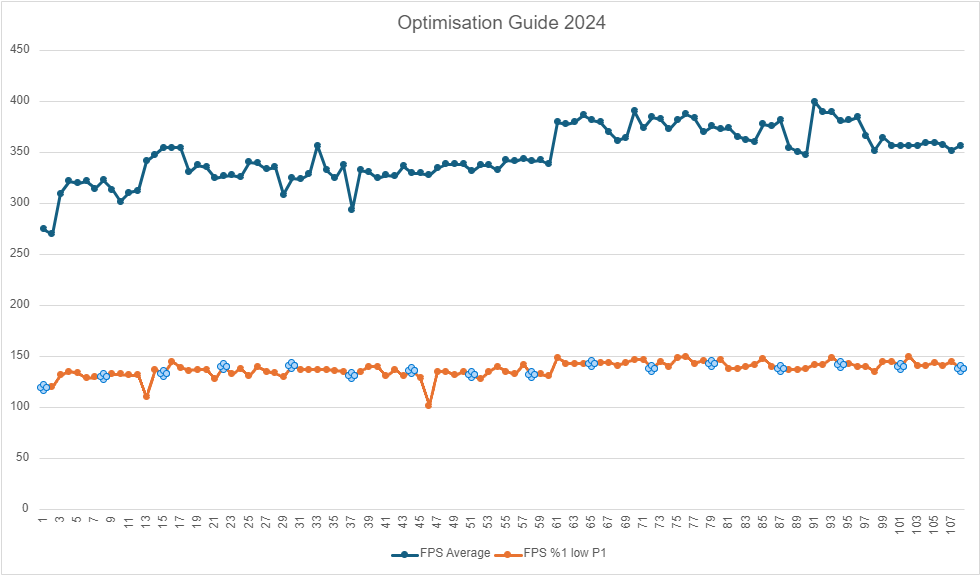
COMPLETE BENCHMARK DATA
| Date | Benchmark # | FPS Average | FPS %1 low P1 | Resolution |
|---|---|---|---|---|
| 04.10.24 | 1 | 275 | 119 | 1440x1080 |
| 04.10.24 | 2 | 270 | 120 | 1440x1080 |
| 04.10.24 | 3 | 310 | 132 | 1440x1080 |
| 04.10.24 | 4 | 322 | 135 | 1440x1080 |
| 04.10.24 | 5 | 320 | 134 | 1440x1080 |
| 04.10.24 | 6 | 322 | 129 | 1440x1080 |
| 04.10.24 | 7 | 315 | 130 | 1440x1080 |
| 04.10.24 | 8 | 323 | 130 | 1440x1080 |
| 04.10.24 | 9 | 314 | 133 | 1440x1080 |
| 04.10.24 | 10 | 302 | 133 | 1440x1080 |
| 04.10.24 | 11 | 311 | 132 | 1440x1080 |
| 07.10.24 | 12 | 313 | 132 | 1440x1080 |
| 07.10.24 | 13 | 342 | 110 | 1440x1080 |
| 07.10.24 | 14 | 348 | 137 | 1440x1080 |
| 07.10.24 | 15 | 355 | 133 | 1440x1080 |
| 07.10.24 | 16 | 355 | 145 | 1440x1080 |
| 07.10.24 | 17 | 355 | 139 | 1440x1080 |
| 10.10.24 | 18 | 331 | 136 | 1440x1080 |
| 10.10.24 | 19 | 338 | 137 | 1440x1080 |
| 10.10.24 | 20 | 336 | 137 | 1440x1080 |
| 10.10.24 | 21 | 325 | 128 | 1440x1080 |
| 10.10.24 | 22 | 327 | 140 | 1440x1080 |
| 10.10.24 | 23 | 328 | 133 | 1440x1080 |
| 10.10.24 | 24 | 326 | 138 | 1440x1080 |
| 10.10.24 | 25 | 341 | 131 | 1440x1080 |
| 10.10.24 | 26 | 340 | 140 | 1440x1080 |
| 10.10.24 | 27 | 334 | 135 | 1440x1080 |
| 10.10.24 | 28 | 336 | 134 | 1440x1080 |
| 10.10.24 | 29 | 309 | 130 | 1440x1080 |
| 10.10.24 | 30 | 325 | 141 | 1440x1080 |
| 10.10.24 | 31 | 324 | 137 | 1440x1080 |
| 10.10.24 | 32 | 329 | 137 | 1440x1080 |
| 10.10.24 | 33 | 357 | 137 | 1440x1080 |
| 10.10.24 | 34 | 333 | 137 | 1440x1080 |
| 10.10.24 | 35 | 325 | 136 | 1440x1080 |
| 10.10.24 | 36 | 338 | 135 | 1440x1080 |
| 10.10.24 | 37 | 294 | 131 | 2560x1440 |
| 10.10.24 | 38 | 333 | 135 | 1440x1080 |
| 10.10.24 | 39 | 331 | 140 | 1440x1080 |
| 10.10.24 | 40 | 325 | 140 | 1440x1080 |
| 10.10.24 | 41 | 328 | 131 | 1440x1080 |
| 10.10.24 | 42 | 327 | 137 | 1440x1080 |
| 10.10.24 | 43 | 337 | 131 | 1440x1080 |
| 10.10.24 | 44 | 330 | 136 | 1440x1080 |
| 10.10.24 | 45 | 330 | 129 | 1440x1080 |
| 10.10.24 | 46 | 328 | 102 | 1440x1080 |
| 10.10.24 | 47 | 335 | 135 | 1440x1080 |
| 10.10.24 | 48 | 339 | 135 | 1440x1080 |
| 10.10.24 | 49 | 339 | 132 | 1440x1080 |
| 10.10.24 | 50 | 339 | 135 | 1440x1080 |
| 10.10.24 | 51 | 332 | 132 | 1440x1080 |
| 10.10.24 | 52 | 338 | 128 | 1440x1080 |
| 10.10.24 | 53 | 338 | 135 | 1440x1080 |
| 10.10.24 | 54 | 333 | 140 | 1440x1080 |
| 10.10.24 | 55 | 343 | 135 | 1440x1080 |
| 10.10.24 | 56 | 342 | 133 | 1440x1080 |
| 10.10.24 | 57 | 344 | 142 | 1440x1080 |
| 10.10.24 | 58 | 342 | 132 | 1440x1080 |
| 10.10.24 | 59 | 343 | 133 | 1440x1080 |
| 10.10.24 | 60 | 339 | 131 | 1440x1080 |
| 11.10.24 | 61 | 380 | 149 | 1440x1080 |
| 11.10.24 | 62 | 378 | 143 | 1440x1080 |
| 11.10.25 | 63 | 380 | 143 | 1440x1080 |
| 11.10.26 | 64 | 387 | 143 | 1440x1080 |
| 11.10.27 | 65 | 382 | 143 | 1440x1080 |
| 11.10.28 | 66 | 380 | 144 | 1440x1080 |
| 11.10.29 | 67 | 370 | 144 | 1440x1080 |
| 11.10.30 | 68 | 362 | 141 | 1440x1080 |
| 11.10.31 | 69 | 365 | 144 | 1440x1080 |
| 11.10.32 | 70 | 391 | 147 | 1440x1080 |
| 11.10.33 | 71 | 374 | 147 | 1440x1080 |
| 11.10.34 | 72 | 385 | 138 | 1440x1080 |
| 11.10.35 | 73 | 383 | 145 | 1440x1080 |
| 11.10.36 | 74 | 373 | 140 | 1440x1080 |
| 11.10.37 | 75 | 382 | 149 | 1440x1080 |
| 11.10.38 | 76 | 388 | 150 | 1440x1080 |
| 11.10.39 | 77 | 384 | 143 | 1440x1080 |
| 11.10.40 | 78 | 370 | 146 | 1440x1080 |
| 11.10.41 | 79 | 376 | 143 | 1920x1080 |
| 11.10.42 | 80 | 373 | 147 | 1920x1080 |
| 11.10.43 | 81 | 374 | 138 | 1920x1080 |
| 11.10.44 | 82 | 366 | 138 | 2560x1440 |
| 11.10.45 | 83 | 363 | 140 | 2560x1440 |
| 11.10.46 | 84 | 361 | 142 | 2560x1440 |
| 11.10.47 | 85 | 378 | 148 | 1440x1080 |
| 11.10.48 | 86 | 376 | 140 | 1440x1080 |
| 11.10.49 | 87 | 382 | 138 | 1440x1080 |
| 15.10.24 | 88 | 355 | 137 | 1440x1080 |
| 15.10.24 | 89 | 351 | 137 | 1440x1080 |
| 15.10.24 | 90 | 348 | 138 | 1440x1080 |
| 17.10.24 | 91 | 400 | 142 | 1440x1080 |
| 17.10.24 | 92 | 390 | 142 | 1440x1080 |
| 17.10.24 | 93 | 390 | 149 | 1440x1080 |
| 17.10.24 | 94 | 381 | 142 | 1440x1080 |
| 17.10.24 | 95 | 382 | 143 | 1440x1080 |
| 17.10.24 | 96 | 385 | 140 | 1440x1080 |
| 17.10.24 | 97 | 367 | 140 | 1440x1080 |
| 17.10.24 | 98 | 352 | 135 | 1440x1080 |
| 17.10.24 | 99 | 365 | 145 | 1440x1080 |
| 17.10.24 | 100 | 357 | 145 | 1440x1080 |
| 17.10.24 | 101 | 357 | 140 | 1440x1080 |
| 17.10.24 | 102 | 357 | 150 | 1440x1080 |
| 17.10.24 | 103 | 357 | 141 | 1440x1080 |
| 17.10.24 | 104 | 360 | 141 | 1440x1080 |
| 17.10.24 | 105 | 360 | 144 | 1440x1080 |
| 17.10.24 | 106 | 358 | 141 | 1440x1080 |
| 17.10.24 | 107 | 352 | 145 | 1440x1080 |
| 17.10.24 | 108 | 357 | 138 | 1440x1080 |
To view online, visit shared folder here:
Thank you for your work ! At last something serious with benchmarks at every level !
No worries friend. Hope it helps at least one of you!
huge guide, love it
ty for ur job!
Amazing post, thank you for your time <3
Thanks <3
Thank you <3